Tips and tricks for mastering Revit. A place to share knowledge, families, and ask questions, keeping Revit fun and efficient.
Tuesday, September 23, 2008
Downloads
I've posted a downloads site for Revit files. Feel free to upload or download anything helpful for Revit. Please try to upload it to the appropriate folder. Thanks.
Wednesday, September 17, 2008
Topo Incorrect
Revit and topo files just never seem to work for us right away, we have to make them work. No matter how hard we try to import them to elevation zero, it refuses to actually end up there, or, it ends up there, but when we edit the toposurface, the points say they are at one elevation, but in Revit it is at a different elevation. Here has what has been working for us.
Import the topo file at elevation zero. This may mean creating a new level called Site Level. Create the topo using toposurface- use instance- import instance, then select the topo lines only. Check the elevation of the toposurface. I set a level to a known height, change it's view properties to cut at zero, and go to that view to see if the cut is taken at the proper place compared to the original Cad file. Usually this puts it in the right spot, but does not mean that revit think the points are right. Edit the toposurface, click a know point and it may be off by 10 feet or more. Not to worry, if revit is taking the cut in the right place, then leave it alone.
In some instances Revit will put the toposurface at the wrong elevation, 100 feet or more off. Edit the toposurface, click on a known point and right down the difference of what that point should be. Go into an elevation and move the whole toposurface up the difference to put it in the right place. Take a cut through it and make sure the cut is taken in the right place.
Unfortunately topo has always been a guess and check thing for us, no magical fixes found yet. We've tried isolating the topo and double checking everything in Autocad. It appears to be a Revit issue though. So anyone out there having the same issue. Know that we all do.
Tuesday, September 16, 2008
Essential Revit Shortcut Keys
Revit has some great default shortcut keys, but there are a lot of commands that I use fairly regularly that deserve shortcuts applied to them.
SY Symbol
DC Detail Component
FR Filled Region
IN Insulation
RC Revision Cloud
RD Repeating Detail
DG Detail Group
Download the pdf or excel sheet of Revit Shortcuts at my downloads page here. It is located in the 'revit files' folder under 'documentation'. Please upload any helpful user created Revit families to my uploads/downloads page. I believe if there is no folder fitting the category you can create your own.
Thanks,
Nick
Friday, September 12, 2008
Standard Details in Revit

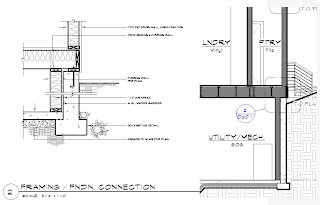
This time I'm going to talk specifically about standard details. There is a number of ways to import and utilize your Cad files, many of which you may have already tried. The way that makes the most sense to me is to import them into a drafting view.
First create a new drafting view. View--New--Drafting View. Then go to that view, import it making sure you switch the colors to black and white, and bam, you have your detail. There is no 0,0 center like in Autocad. Just place it anywhere or center to center and set your scale appropriately.
Now that you have this view you can reference it. View--New--Callout. When you select the callout command you have the option in the bar to 'Reference other view:' and you can select the view you just imported. Now your standard detail may be used whithout it actually using the model.
If you don't see the detail you just added, you might need to place it on a sheet first.
Thursday, September 11, 2008
Manage AutoCad files in Revit

Most likely if you are using Revit, you have switch from, or still use AutoCad. At first, it may seem frustrating to deal with AutoCad files in Revit, but with a few helpful tips, they can be really friendly. The first thing you need to decide is how are you going to use this file? Is it a detail? Is it a file from the surveyor? Do I want to see it in 1 view or multiple views?
When you import the file, you have a slew of options.
Link File- (only if the file will change)
Current View Only
Colors (will you see this file in the final product- if so, make black and white)
Layers
Positioning
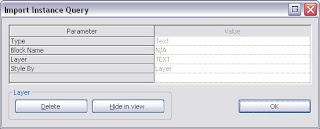
Once you get the file in how you want it and how it will work for your application there is a really easy way to manage you layer without going to Visibility Graphics. Click on the imported file and select QUERY from the toolbar that pops up. This will allow you to click on a line, and Revit will tell you what the layer is called. Then you can choose to delete it, or hide it, or close the dialog box and select a different layer. This is a VERY FAST way of MANAGING YOU AUTOCAD FILES.
Do not explode your AutoCad files unless you cannot do what you need to do this way. When you explode an AutoCad file, you get stuck with dozens, or even hundreds of linetypes that will be added to your project making life miserable.
Subscribe to:
Posts (Atom)